This type of sign is permanently wired into the wall, with no visible cords. This installation requires a licensed electrician.
Note: If you’re not looking for a permanent installation, please see Installation: Plug-and-Play

How it works:
The sign includes 12V DC power leads coming out of the back of the sign and a power adapter. It is up to an electrician / contractor to install wiring inside the wall either through conduit or other appropriate means to a spot where the power supply can be connected.
Step 1: Drill holes

Your sign will include a template that indicates where to drill holes for the studs to mount the sign (included), as well as where to drill holes for the wires. Each sign part will have a different wire location. Note: We are unable to ship the template before the sign is finished. For more details on this process, refer to Installation: Studs
Step 2: Thread wires

Every illuminated part of your sign will have its own power wire. For the cleanest look, each illuminated part will require its wire to be passed through or into the wall so it is not visible on the front.
Step 3: Connect power supply
Option 1: Through-wall wiring

A cord is run down to a standard outlet. This is common when the outlet already exists near the sign location.
After installing the sign’s wiring into through the wall, the power supply junction box can be situated at either end of the raceway. Some people prefer to run conduit / building power directly to the box, an others have simply run a standard plug to a nearby outlet.
Option 2: In-wall wiring

An access panel is installed for the power supply. All the 12V wires will need to run inside the wall and possibly through studs to this in-wall box.
If your walls are still under construction or you would prefer a cleaner look, an in-wall box with access door can be installed to house the wires and power supply. This option will require the power to be routed into the box directly (not plugged into an outlet)
Additional notes:
Power
110V standard AC power will work for all our signage.
Outlet
This is up to your electrician.
- Some electricians run conduit to the back of the wall where the sign will be and install a hard-wired junction box.
- Others will still install j-box, but run a cord down to a standard outlet. This is common when the outlet already exists near the sign location.
- If your electrician is adding an outlet, locating that outlet near the sign itself or above the ground like a standard outlet works as well.
Switch
- We recommend having the electrician install a switch at the junction box.
- Alternatively, a smart plug can be installed if using a standard outlet, so the sign can be controlled with an app and scheduled to turn on / off automatically with business hours.
- We can include a remote control to switch on/off, but if the remote is lost the whole control module has to be replaced.

Low voltage wire
Sign will ship with a low voltage wire emerging from the backside. Fish this wire into the drywall and up to where the power supply housing is located. The low voltage wire is rated for in-wall without needing conduit. If your space is a new build, adding low voltage “smurf tube” could be a time saver, but usually is not required.
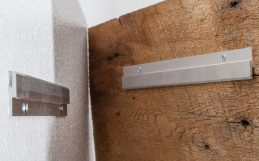
Power supply
Sign includes a steel power supply housing meant to be installed in an inconspicuous place near the sign.
- Install on the backside of the wall if it’s in front of a storage space or similar.
- Install overhead above a drop ceiling
- Install in an inconspicuous place near the celling or other structures above if neither of those options are available
AC power
AC power will need to be ran to the location where the power supply housing is located. The power supply can run on 120VAC- 277VAC and generally only requires a max of 1A on the circuit. For larger signs, sometimes 2 or more power supplies are needed, in which case allot 1A per power supply. We will note in your proposal if this is the case.